Your first plan in 10 minutes
From nothing to your first road on your own world, with the blocks it needs counted. No account, no install.
For App · browser and desktop · Updated
You'll open your world in MC Planner, draw a road on it, pick its block and see how many blocks it takes. Then you save it.
Open MC Planner
Go to app.mc-planner.com and press Get started. Nothing to install, no account.
Using the desktop app? It skips the next step and lists the game files and worlds it found on your computer: click your version, then your world. (With only one game file, it's picked for you.)
Say where you play
"Where do you play Minecraft?" Pick your launcher: Official launcher, Modrinth App, CurseForge, Prism / MultiMC or Something else. MC Planner then shows the exact folders on your computer.
The paths are for the system it detected. Wrong one? Press Not on Windows? (or your system) and pick another.
Bring your blocks
Follow the three short steps on the card: open the folder, find the version you play, and drag its .jar file (for example 26.2.jar) onto the window.
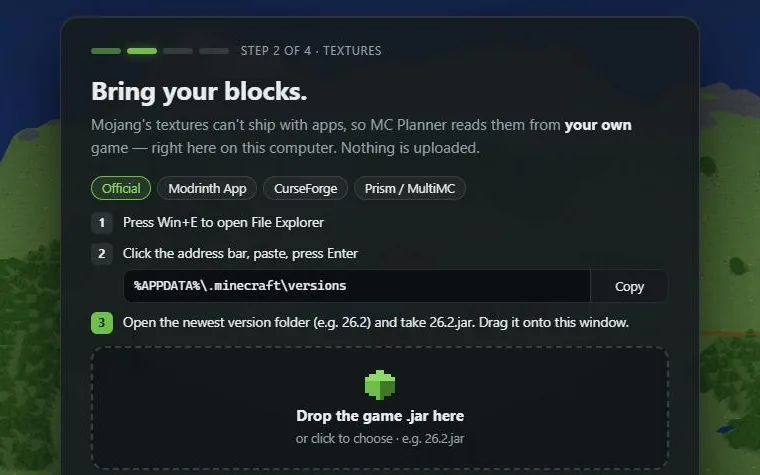
- 1: Your launcher
- 2: Copy the folder's path
- 3: Drop the game .jar here
Your launcher (1), the folder to open with Copy (2), and where to drop the file (3). "Your blocks are here." means it worked. The file is read on your computer, never uploaded. More in Bring your blocks.
Open your world
"Which world are we planning?" Drop your world's folder (from saves) or a .zip of it onto the window, or press Choose the world folder. Where are my worlds? on the card shows the folder.
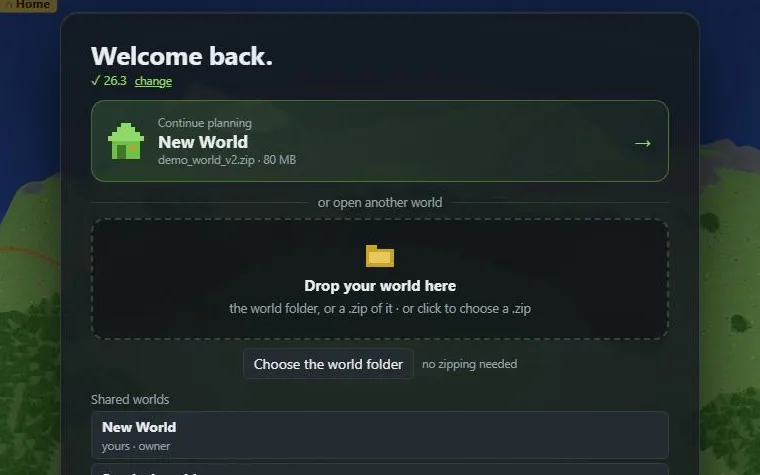
- 1: Drop your world here
- 2: Choose the world folder
MC Planner only reads your world. It never changes your save.
Pick what to plan first
While your world loads, MC Planner asks "What do you want to plan first?": A road or path, A village or town, A build or Just look around. Pick one and a short tour starts right there. Skip if you'd rather look around on your own.
Look around
Drag the map to move and scroll to zoom. Right-drag turns the view.
Keyboard: W A S D move, Q E turn, + − zoom. H flies back home.
Draw a road
Press 2 or pick Path on the left (1). Click on the map to set points along your road. Enter or a double-click finishes it.
Made a mistake? Backspace removes the last point, Esc starts over.
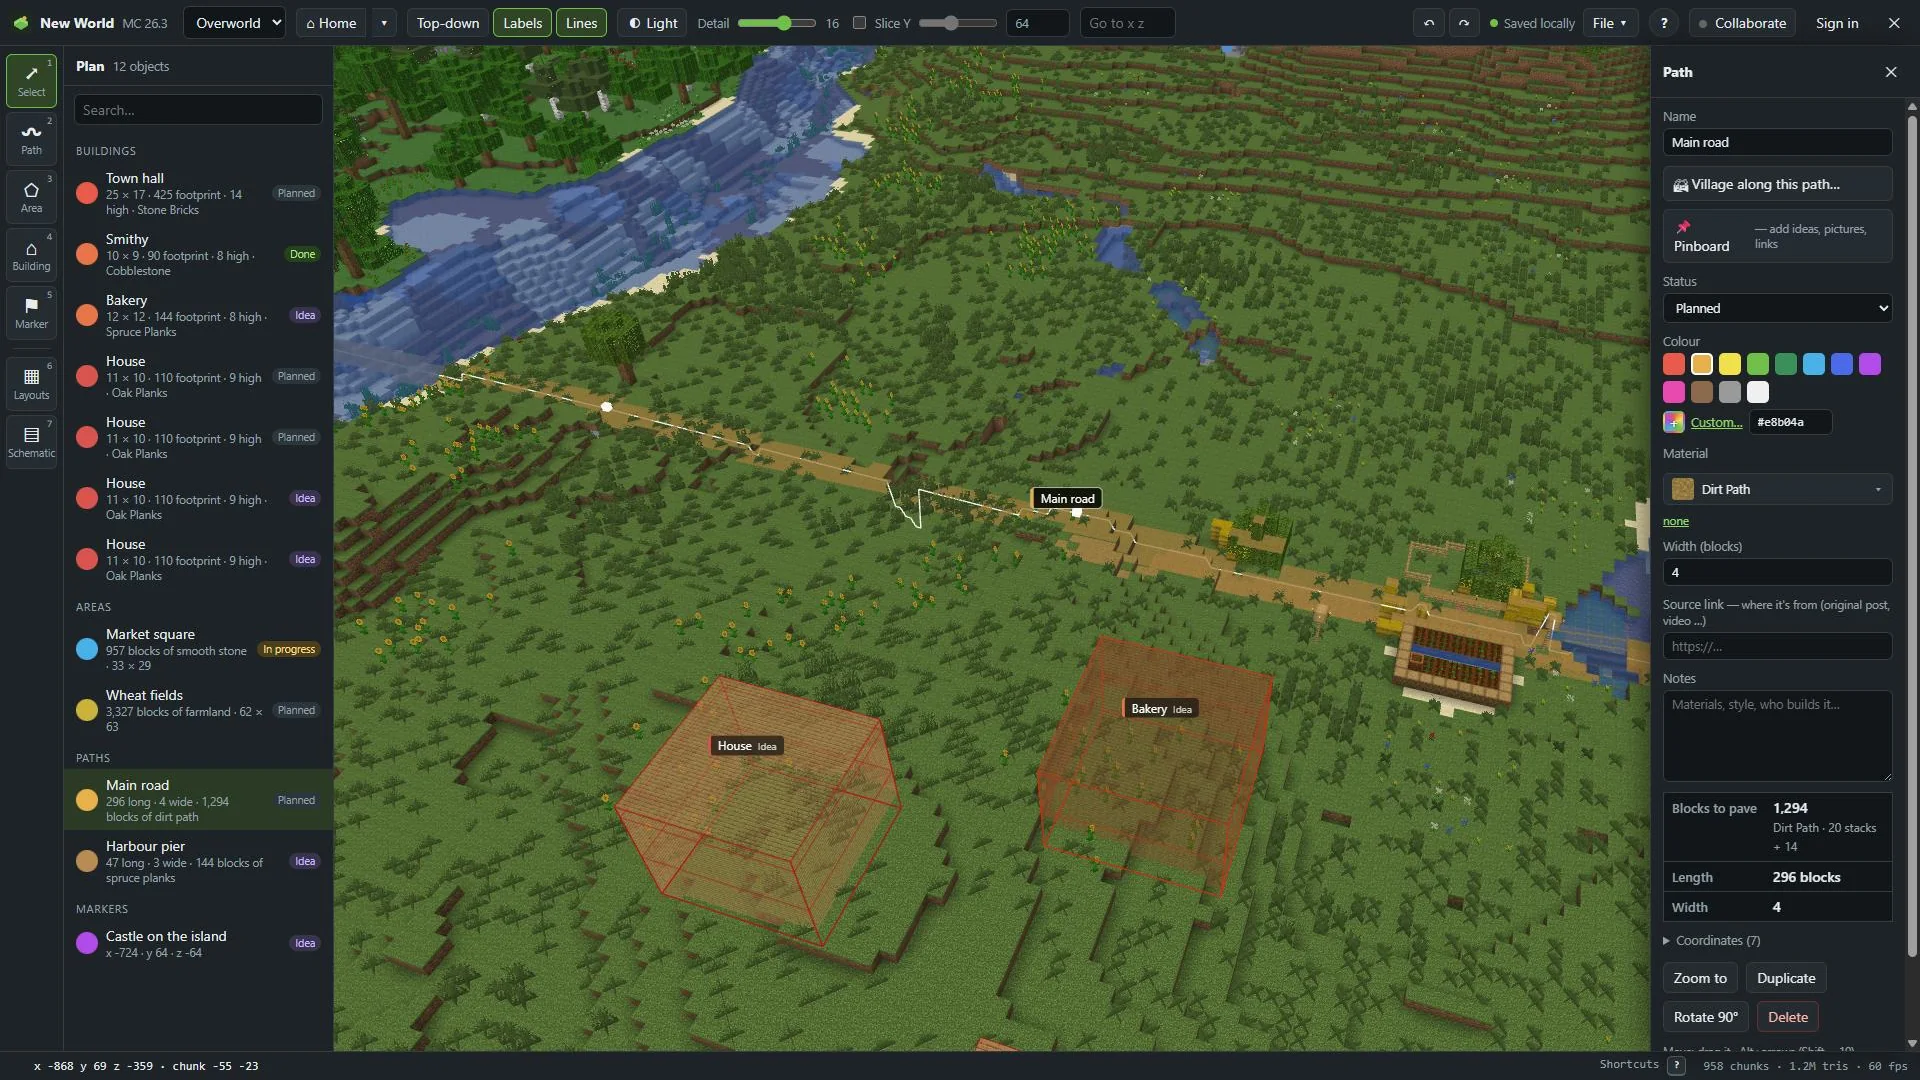
- 1: Path tool
- 2: Material
- 3: Blocks to pave
- 4: Status
Pick its block and read the count
Your new road is selected, and the inspector on the right shows it. Under Material (2), pick the block it's made of, for example Dirt Path. The road now shows in that block's texture.
The numbers at the bottom (3) are what you'll gather: Blocks to pave, with stacks, the Length and the Width. Change the width under Width (blocks) and the count follows.
Set its status
Under Status (4): Idea, Planned, In progress or Done. The plan list on the left shows every object with its status.
Save it
Everything you do is saved in this browser by itself ("Saved locally" at the top). For a copy you can keep or move to another computer: File ▾ → Save plan file… or Ctrl+S. It downloads a .mcplan file (the desktop app saves it to Documents\MC Planner).
Before big changes, File ▾ → Save version. You can always go back.
You can now…
Open your world, draw a road and know how many blocks it takes. The Getting started list in the corner of the map points at the next things to try: layouts, schematics, pinboards and planning with friends. Help (?) → Show getting started brings it back.